
Photographing the arts: Different Spaces—on venue size, and lens choice
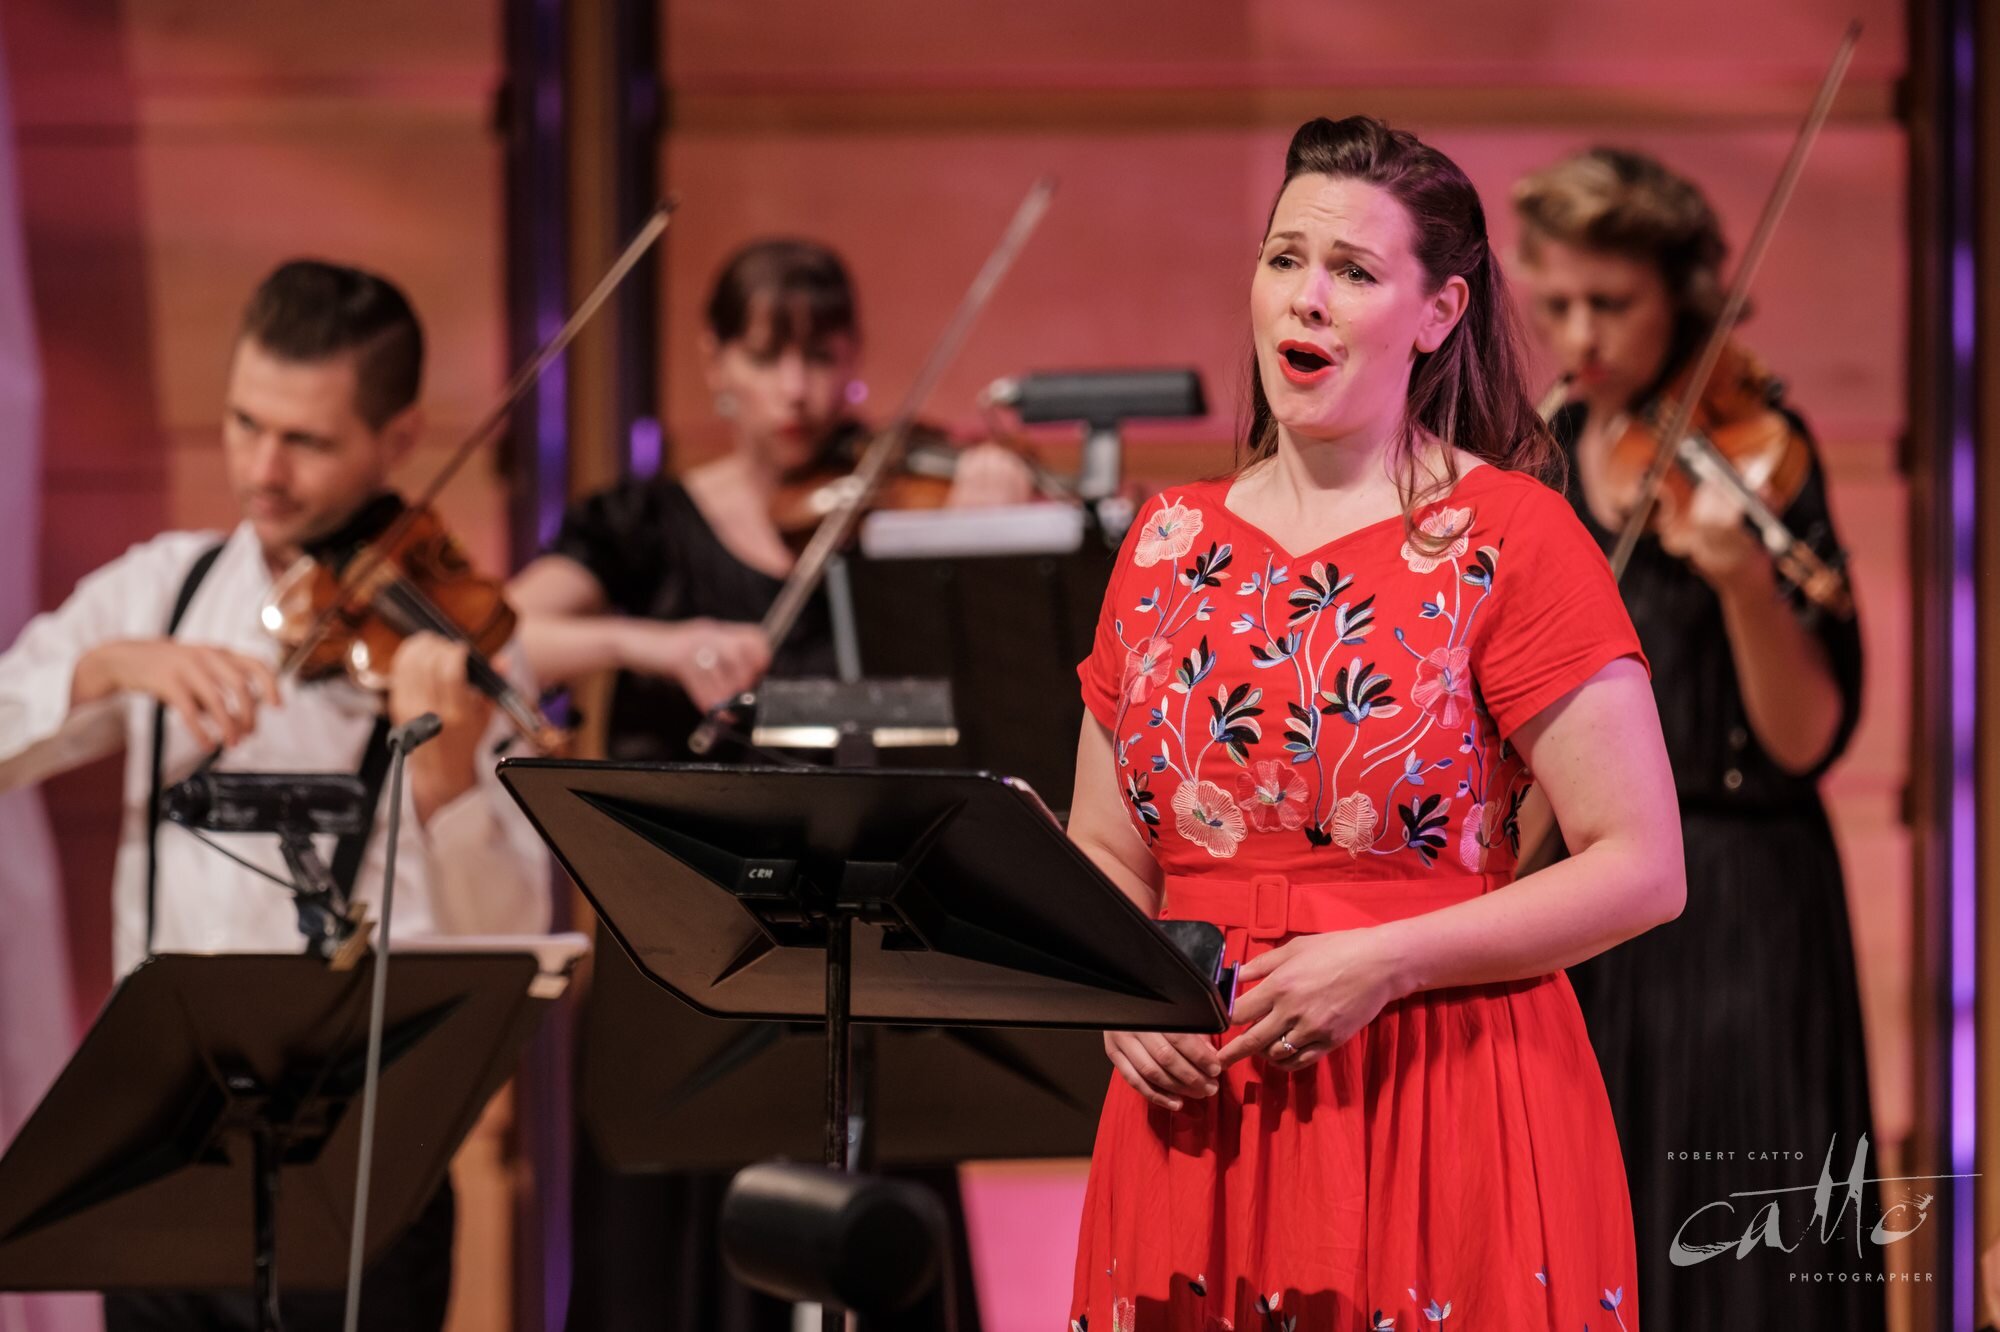
Soprano Jacqueline Porter, performing with the Australian Romantic & Classical Orchestra at City Recital Hall, Sydney.
One of the trickiest things as a performing arts photographer is going into a theatre or concert hall you haven’t worked in before, and trying to pick the right places to be, and which lenses to use, for a show.
In most situations, I have two camera bodies on the go at any time, so I can have different lenses mounted on each of them to cover a wider range of fields of view—and of course so that if one camera has a problem of some kind, I can immediately switch to the other one. (Fortunately that doesn’t happen very much!)
The choice of which lenses depends a lot on the size of the room I’m in, but also what I’m trying to do in the shoot. If I’m hired by the venue to create marketing images that will help them rent the space to other producers, then I’m going to be aiming more for wide views of the full stage and auditorium from angles that show off the atmosphere—where if I’m working for the producer of a show that’s going on tour, I’m going to be focussing much more on the performers, and less on the room itself. So the lens choices are different in each of those cases.
But going into a room I don’t know is a special challenge, especially if I’m photographing while there’s an audience watching. If I have to stay out of sight and not disturb anyone, then I’ll need longer lenses than if I can be up at the front of the room capturing tight portraits of the performers on stage, during a rehearsal.
So, how long is long enough? And how do I work that out ahead of time, so I know what to bring—or to rent, if my own equipment isn’t going to work?
Often I’ll do a site visit ahead of time to find out what options might be available on the night, and I might take some test images (especially if there’s a rehearsal in progress) to see what’s going to work. That’s not always an option, of course.
The other option is to go online, and see if the plans for the venue are available. Often there will be a seating plan for ticketing, which might not be to scale but can give a sense of the size of the room. Venues that are available for hire often have a technical section of their website, where scale drawings of the room are available for designers; those are the most useful, because I can find exactly what distances from the stage are involved, and if there are pillars, posts, or overhanging balconies that will obstruct my view from certain places.
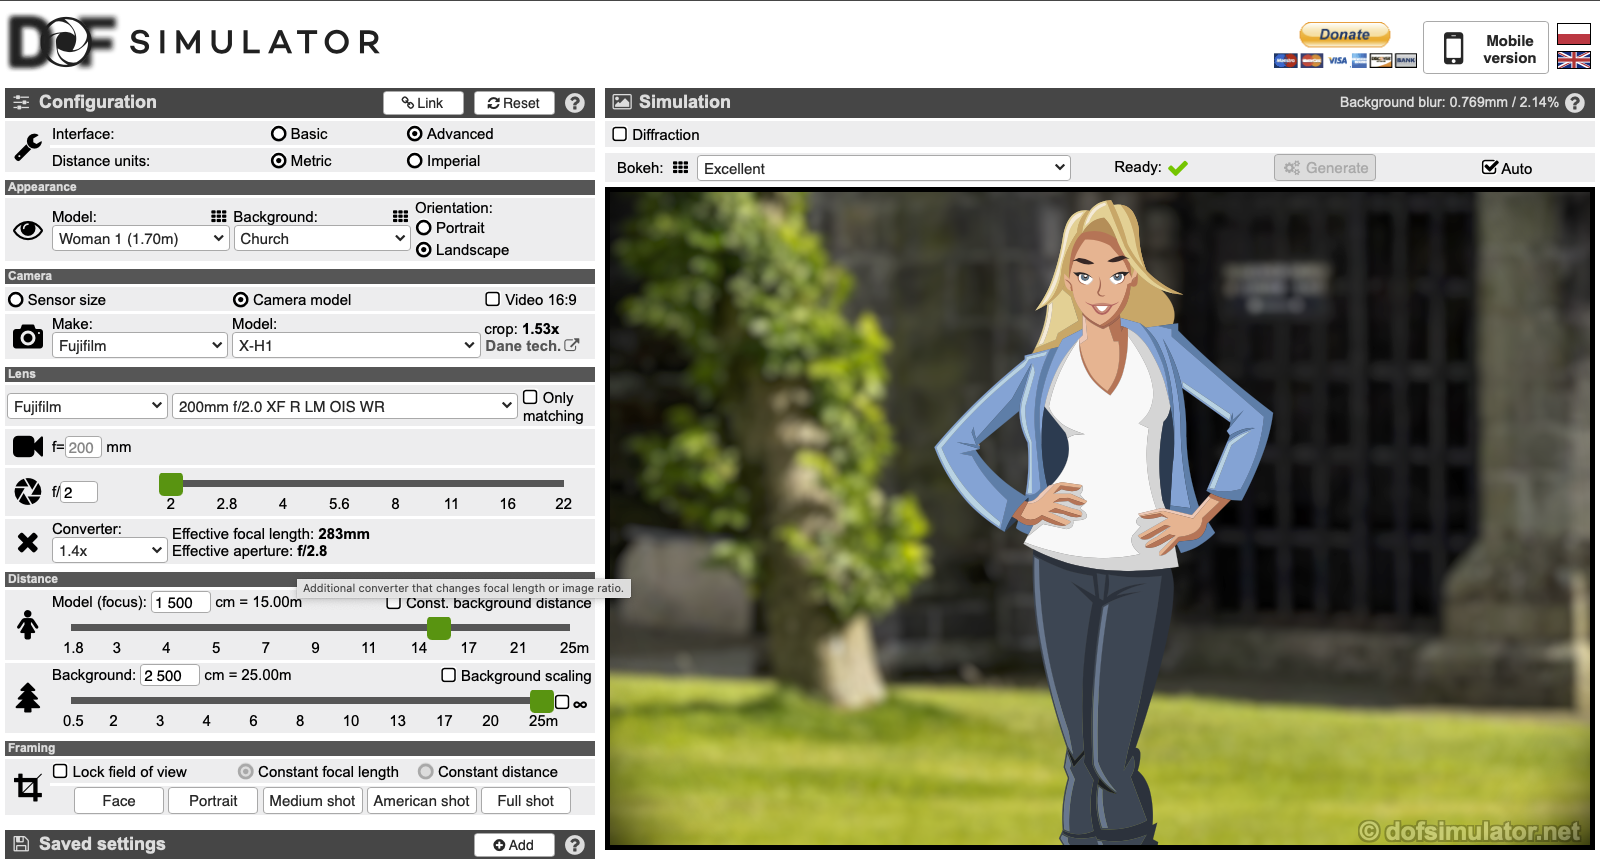
From there, I can hop over to a site like the Depth Of Field Calculator—which isn’t exactly designed to do what I’m doing here, but works nonetheless. I can put in the distance I’ll be from the stage, add my camera model/sensor size and lens length, and it’ll show me roughly what a person will look like at that distance—so I can tell whether I’ll just be close enough for a full-length image, or if I can get a closeup of a performer, and which lens I should have in my hands at the start of the show. Or, I can put in what lenses I have, and it’ll tell me how close I need to get if the client asks for a tight portrait of a performer.
Here’s an example—I’ve been photographing the Australian Romantic & Classical Orchestra this year, who perform at City Recital Hall here in Sydney; and from the plans on their website, the room is about 20m from the back of the stalls to the stage. I couldn’t find technical plans, so I approximated based on there being 21 rows of seating at ~1m each on the seating chart. (I also knew I’d be able to move forward a little bit, so I could get slightly closer than the back wall of the room if I needed to.)
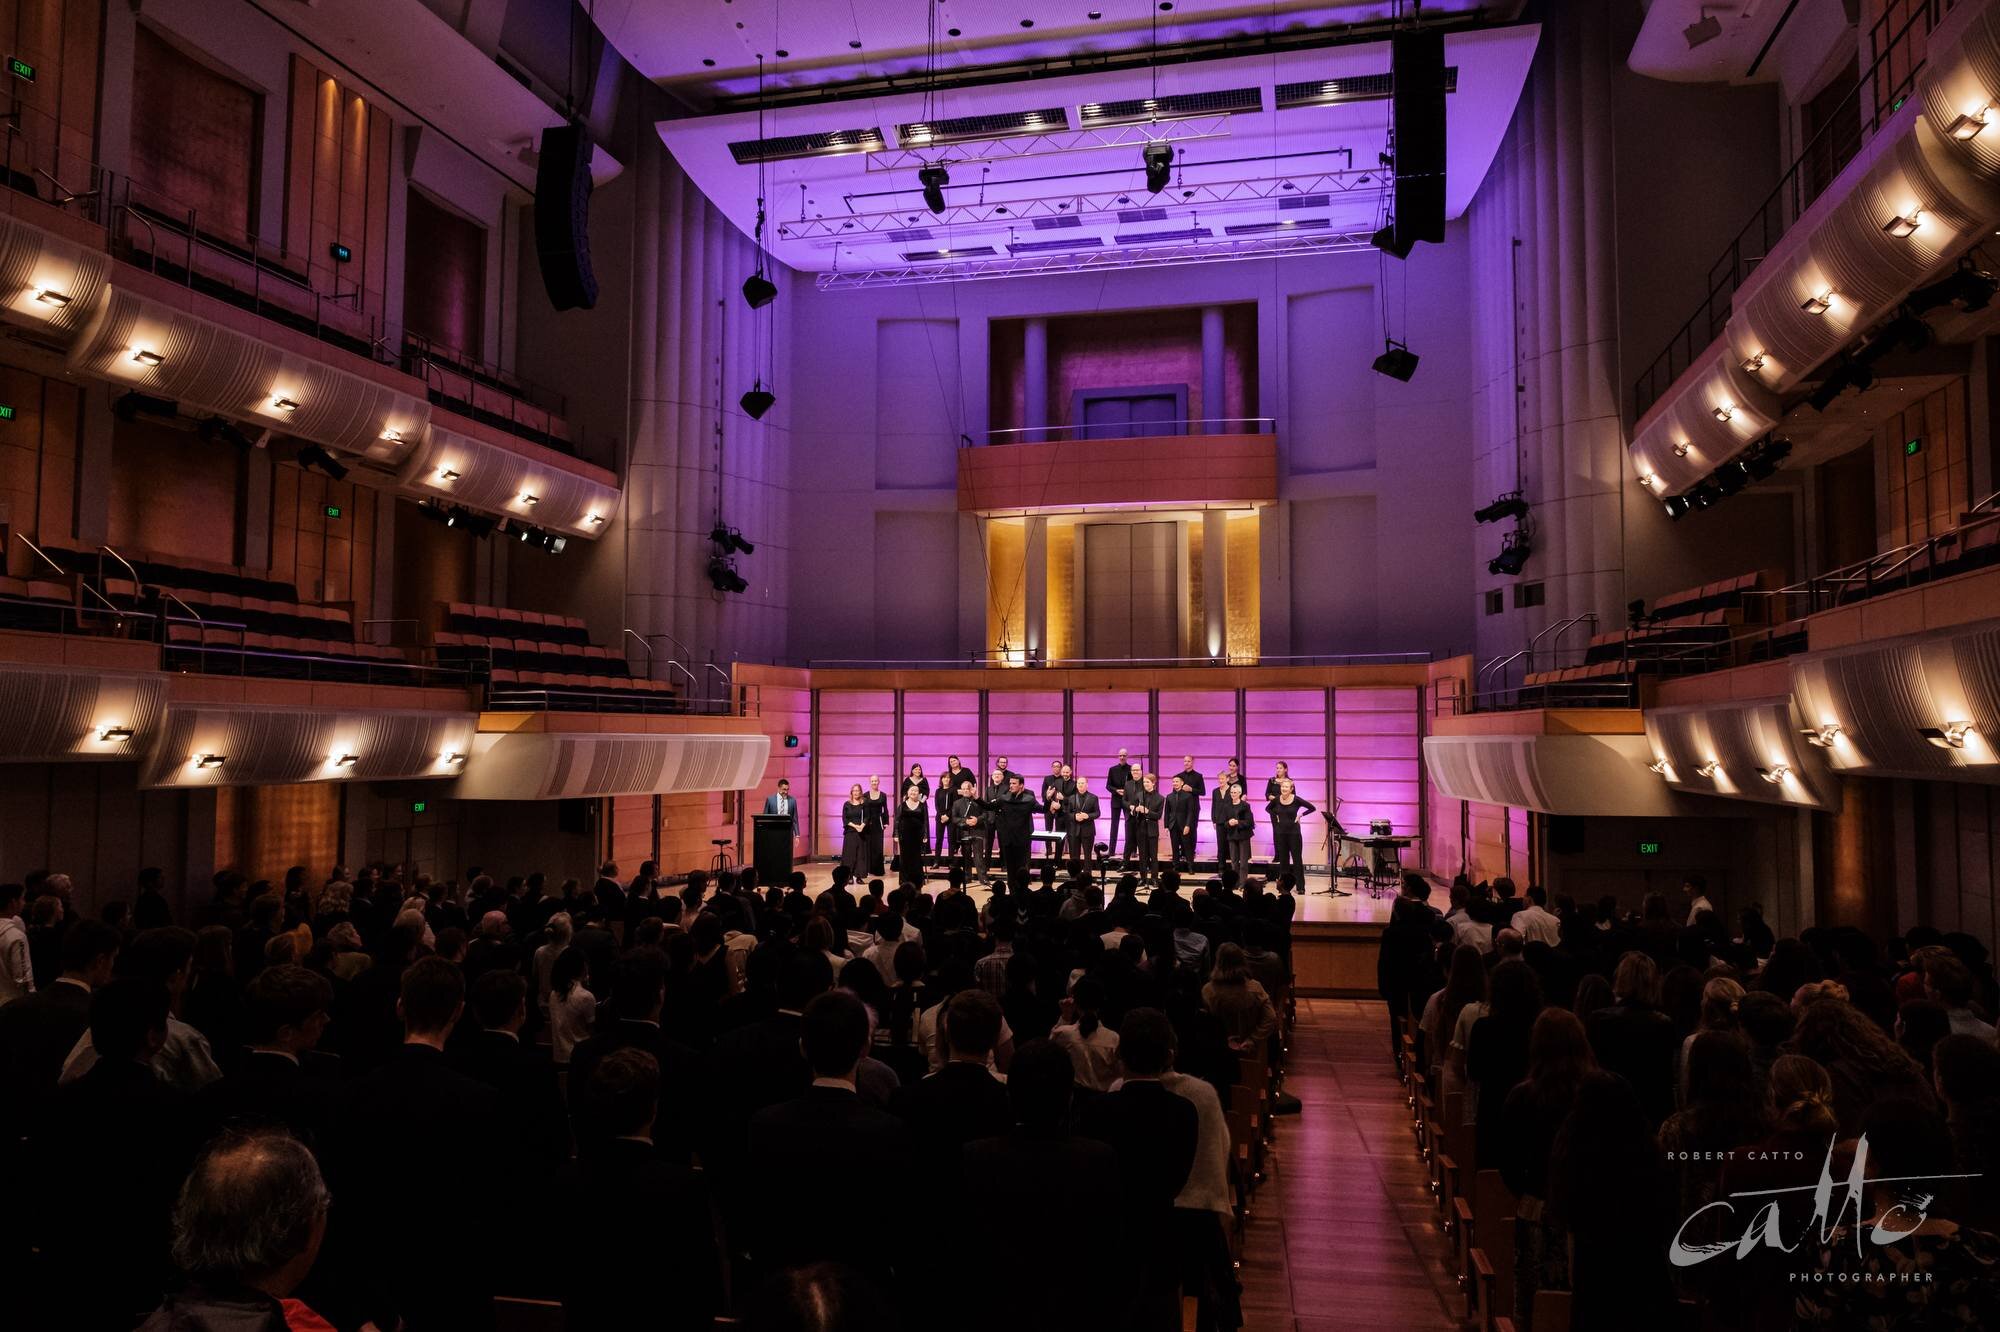
With my Fujifilm X-H1 and my longest lens (a 200mm f/2 using a 1.4x teleconverter), this is what the DOF Calculator predicts will be my field of view on a performer on stage, and after that, how it predicted a wide view would look from the same distance with a 16mm lens on the same camera, along with actual examples from a concert earlier this year. You can click/swipe right to see the actual images, and hover over them to see the captions.
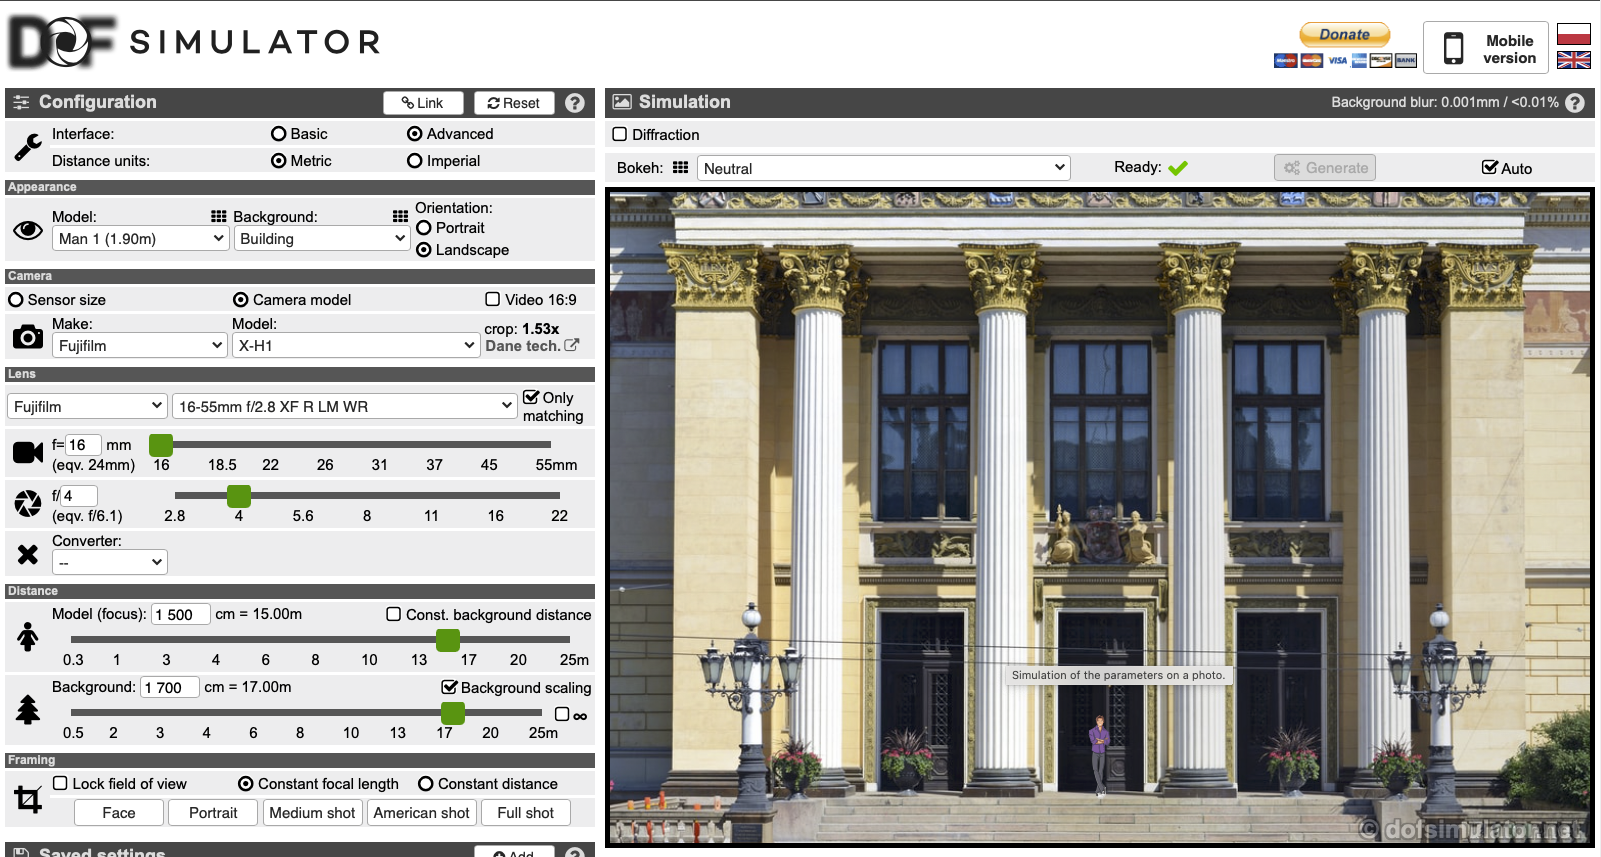


Of course, there are limits to everything—the site doesn’t offer any ‘concert hall interior’ backgrounds, for example, and it doesn’t work when you’re more than 25m from the subject of the image.
So when Sydney Philharmonia Choirs asked if I could photograph their concert at the beautiful, historic, and large Sydney Town Hall—which is about double the size of the Recital Hall—I had to think about how that might work. I’d definitely be there with an audience, so I couldn’t really move around much, apart from between pieces in the programme; so to try to give them a range of views & perspectives, I came up with a plan to give me a few options.
There were three pieces of music in the first half of the concert; so I’d start next to the stage, as the choir walked out and for the first piece, and see if I could get some close portraits from there including of the conductor, Brett Weymark. Then, while the audience applauded, I’d move to the back corner of the ground floor for the second piece, and cross to the other back corner for the third one—and for the second half (Carmina Burana, the largest work they were performing) I’d go upstairs to the centre of the balcony. That would be the furthest point from the stage, but would give me options for both centred wide-angle images of the whole room as well as (hopefully) individual images of the soloists and different sections of the choir.
Looking at plans of the room online, it looked like that could work well—but I knew the distances would be large when I got to the back of the room. Scale plans online suggested I’d be about 50m away, at the back of the room and the balcony; but in terms of staying out of the paying audience’s way, that really was the best possible scenario. (Before the show, I timed my walk from the front of the room to the back; and when the time came, I made it into position just as the audience’s applause finished.)
Of course again, I always have that second camera on my other shoulder—so when I was close, I could get very tight portraits with the 200mm f/2, as well as some wider options with the 50-140mm f/2.8; and when I got upstairs, I could take some huge, wide views of the overall venue with a large audience in it with the 8-16mm f/2.8 as well.
And let’s not forget, there’s always a bit of room for cropping! Either to straighten the perspective in the wider angle images, or to get rid of some of the extra space around a soloist in the tight ones. I hate throwing away image detail, but if we’ve reached the limits of magnification, it’s another option to bring the focus onto one part of an image.
So, whether you’re a photographer trying to figure out how to work in a new venue for the first time—or, a client needing to see what might be possible for a photographer to capture at an upcoming event—you might be able use the DOF calculator to approximate what a person might look like at the distance the photos will be taken from, or use the venue plans to work out where the best camera positions could be.
It’s just math, really—and it works! And that’s one of my favourite things about photography: it’s a big math and physics puzzle, with an aesthetic and artistic outcome.
[More about lens choice and the meaning of framing here!]